decode345
Honeywell 345 Mhz decoding
MQTT and OpenHAB
My original purpose in reading and parsing the sensor data was to integrate the sensor states into my home automation system. I use OpenHAB, which supports integrating data from arbitrary sources via the MQTT Binding.
The Sender
I used paho-mqtt library, which is available in Python and a number of other languages. I decided just to send each sensor’s open/closed state. It would require additional overhead (creating “items”) on the OpenHAB side to record the low battery state, tamper state, etc. For me, it wasn’t worth it, since if a sensor is in low battery state, it will already appear on the alarm panel and beep annoyingly. And I’m not concerned about anyone tampering with my sensors. If I ever remove the alarm panel, I’ll transmit the battery status to OpenHAB as well.
The code to do this is as simple as:
import paho.mqtt.client as mqtt
client = mqtt.Client()
client.connect(Settings["MQTTHostName"], 1883, 60)
client.publish("/security/"+devicelist[device],"OPEN" if 1<<7 & status >0 else "CLOSED")
client.disconnect()
The receiver
There are already number of tutorials on getting MQTT woqrking with OpenHAB so won’t repeat that here. The item file entries I use are like this:
Contact security_BasementDoor "Basement Door [%s]" (gSecurity) {mqtt="<[mosquitto:/security/Basement Door:state:default]"}
Contact security_BasementWindow1 "Basement Window 1 [%s]" (gSecurity) {mqtt="<[mosquitto:/security/Basement Window 1:state:default]"}
Contact security_BasementWindow2 "Basement Window 2 [%s]" (gSecurity) {mqtt="<[mosquitto:/security/Basement Window 2:state:default]"}
HABPanel
HABPanel provides a nice UI on top of OpenHAB. The final product looks like:
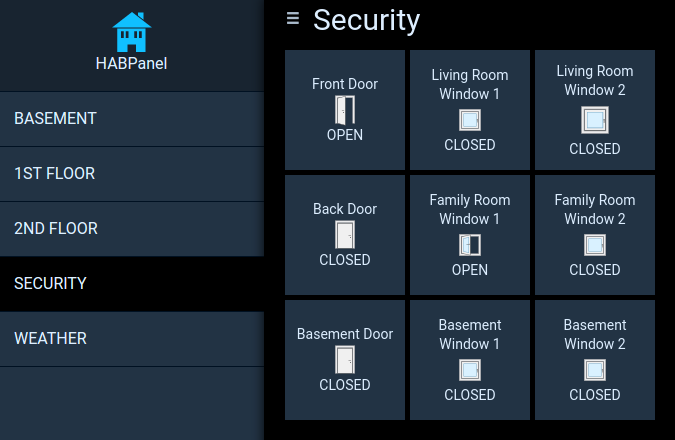
To create the sensor tiles, I use the Template Widget with the following template:
Front Door
\<img class="icon-tile ng-scope"
     src="http://192.168.1.157:8080/icon/door?format=svg&state="
     style="width: 32px; margin: auto; display: block" /\>
And that’s it!
VV Code VV